Creating the Stream
Before you start
Before starting, you should make sure that you have extracted the stream package that you will have received from Dave or Josh. This package contains the background video and image elements you will need. Make sure you put these files somewhere they can stay, as changing their location will mean you’ll have to get OBS to change where it finds them too.
Creating scenes
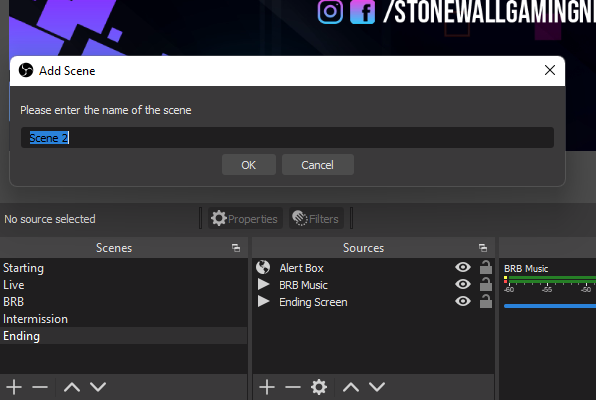
Now it’s time to put the elements in your stream together. First, we’ll need to create some scenes. In the bottom left of the main OBS window, click the + button and add a new scene. Call it “Starting Soon” or something similar, then hit OK. Click on this new scene in the scene selector to make it active.
Adding sources
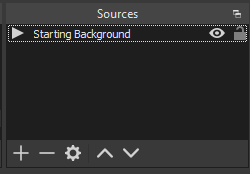
Next, we need to add some sources. Sources are anything from capturing your monitor to your microphone, webcam, images or sound. With our starting scene active, press the + button in the Sources section and select “Media Source”. Give it the name “Starting Background” or similar and press OK. Your screen should now look like this:
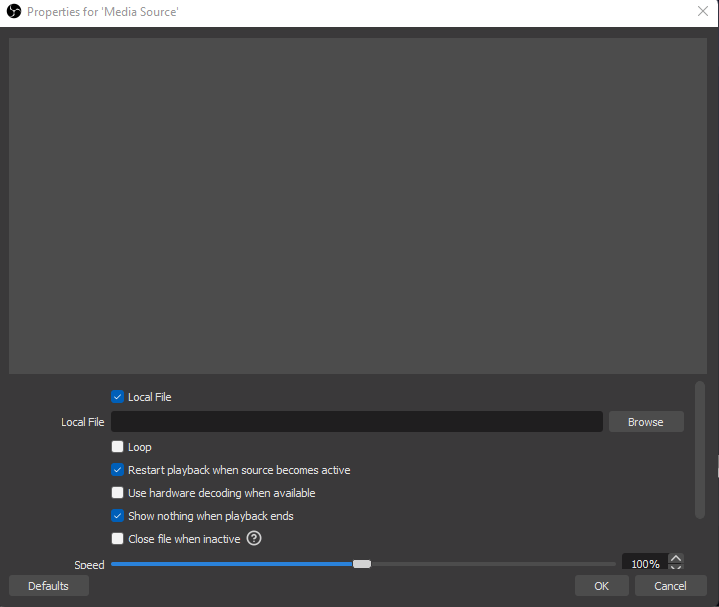
Press the Browse button, then navigate to where you are keeping your stream package files. In this folder you will want to navigate to the “Screens” folder and select “Soon”. In the Properties window in OBS, make sure you tick the “Loop” option. Then press OK. You should now see the starting soon video playing. If the video is too big or too small, click on the video in the preview pane so it has a red box around it, and then press CTRL + F. This will fit it to your canvas size. Your sources box should now show the background source like this:
Next, you will want to find some background music to use. This music MUST be public domain or another license which allows free use and reproduction. Bensound is a popular site for finding this type of music. Be sure to check the usage rights on the sound you select.
To add this music to your scene, you add the source in the same way as the video, except selecting the audio file. Again, make sure it’s set to loop.
You will see your music playing in the audio mixer. The volume for background music should ideally go halfway into the green section of the bar. If it is peaking higher than this, turn it down using the slider. Now, repeat this process and make a scene for BRB, Intermission and Ending.
Reusing sources
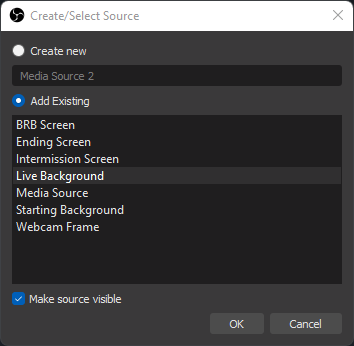
Once you have added a source once, you can add it to other scenes easily. You will see when you add a source of the same type, you have a window where you can select already created sources. The settings that you give a source carry over and update automatically to each scene they are used in.
Scene and source list
You will now want to add more elements to complete your stream. The following is a list of the scenes you will want, and the sources that you should aim to have in them, as well as what type of source each is. Click each scene name to see what you need.
- Alert Box (browser)
- Starting music (media)
- Starting background (media)
- Alert box (browser)
- Webcam (video capture device)
- Your game (game capture or window capture)
- PC Audio (audio output capture)
- Microphone (audio input capture)
- Alert box (browser)
- BRB music (media)
- BRB background (media)
- Alert box (browser)
- Intermission music (media - optional)
- Intermission background (media)
- Chat box (browser)
- Webcam (video capture device)
- Microphone (audio input device)
- Alert box (browser)
- Ending music (media)
- Ending background (media)
The "alert box" is what shows and plays audio when someone follows or raids the stream. It is a browser object that loads a transparent page from StreamLabs, who we use for our alerts. You will need to get the URL for this from Josh or Dave.
Transitions
When moving from scene to scene, we use a video transition. To set this up, click the dropdown in the "Scene Transitions" block and click "Add: Stinger"
Give it a name. Then, in the settings, browse to the file Stinger.webm in your stream package. Then set the setting to look like the following:
After pressing OK, make sure this transition is selected in the Scene Transitions drop down.